
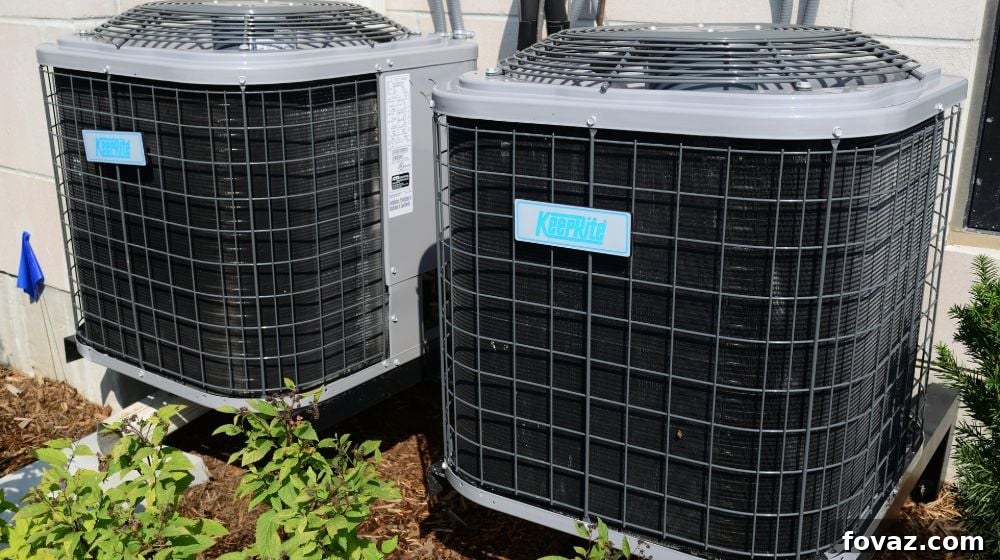
Dealing with a malfunctioning air conditioner can be incredibly frustrating, especially during peak seasons when comfort is paramount. The good news is that not every AC problem requires an expensive service call. Many common issues can be diagnosed and fixed with a bit of knowledge and a willingness to get hands-on. This comprehensive guide will walk you through nine of the most prevalent AC repair tips and troubleshooting tactics you can attempt before dialing a professional technician, helping you save money, time, and restore cool air to your home.
From simple maintenance checks to understanding the core components of your HVAC system, we’ll equip you with the insights needed to tackle minor AC woes. Remember, always prioritize safety: ensure your unit’s power is turned off at the breaker before performing any inspection or maintenance.
RELATED: How To Make A DIY Humidifier To Improve Air Quality In Your Home
Essential AC Repair Tactics to Try Before Calling a Technician
1. Address Dirty Air Filters
A crucial step in AC maintenance is ensuring your air filter is clean and properly installed. Your air filter acts as the first line of defense, trapping dust, pollen, pet dander, and other airborne particles before they circulate through your home or accumulate on your AC’s internal components. A clean filter is vital not only for maintaining optimal indoor air quality but also for allowing your unit to function at maximum efficiency.
When an air filter becomes clogged with accumulated debris, it severely restricts airflow into your AC unit. This forces your system to work harder to pull air through, leading to increased energy consumption, higher utility bills, and accelerated wear and tear on components. Over time, restricted airflow can even lead to more serious problems like a frozen evaporator coil, reduced cooling capacity, or a complete system shutdown.
To prevent these issues, consult your air conditioner’s manual for specific instructions on how often to check and replace or clean your air filter. As a general rule, it’s wise to inspect it monthly, especially during heavy usage periods. Filters in homes with pets, allergy sufferers, or higher dust levels may require more frequent changes. Some filters are disposable and need regular replacement (typically every 1-3 months), while others are reusable and can be cleaned with water and mild detergent.
A straightforward test to determine if your filter needs attention is to hold it up to a light source. If you can’t see light passing through it, or if it appears significantly discolored and dirty, it’s definitely time for a change or thorough cleaning. Regular filter maintenance is one of the easiest and most impactful ways to keep your AC running smoothly and efficiently.
2. Troubleshoot Thermostat Issues
Your thermostat serves as the central command center for your entire HVAC system, accurately measuring the indoor temperature and signaling your AC unit when to activate its cooling cycle. Given its critical role, a wide range of thermostat problems can be the culprit behind an improperly functioning air conditioner, or even one that won’t turn on at all.
Common thermostat malfunctions include incorrect settings, a lack of power, or a miscalibrated sensor. For instance, if your thermostat isn’t set to the “Cool” mode or the temperature setting is too high, it simply won’t instruct your AC to operate. An incorrectly calibrated thermostat might inaccurately read your room’s temperature, leading to short cycling (frequent on-off) or failing to engage the cooling when needed. Similarly, a thermostat that isn’t level or is exposed to direct sunlight can provide skewed readings, tricking the system into believing the room is warmer or cooler than it actually is, causing erratic behavior.
Begin your troubleshooting by performing a few quick checks. First, ensure your thermostat has fresh batteries, as dead batteries are a surprisingly common cause of AC issues. Verify that it’s switched to “Cool” mode and set to a temperature lower than your current room temperature. Check that the thermostat is securely mounted and level on the wall. Avoid placing lamps or electronics that generate heat directly underneath or next to the unit, as this can interfere with its temperature sensing.
Additionally, the thermostat sensor, a small wire typically located near the evaporator coil within your indoor unit, should be positioned correctly without touching the coil itself. If it’s touching, gently bend the wire to adjust its position, ensuring it’s sensing the ambient air temperature rather than the coil’s surface. If these basic checks don’t resolve the problem, or if you suspect a calibration issue, it might be time to call an AC repair technician. They possess specialized tools to accurately diagnose and recalibrate your thermostat or replace it if necessary.
3. Clean Dirty Condenser Coils
A look at a condenser coil. The condenser coil, a critical component usually housed within your outdoor AC unit, plays a pivotal role in the refrigeration cycle by discharging heat absorbed from your indoor space back into the outside air. Because it’s located outdoors, the condenser coil is constantly exposed to environmental elements like dirt, dust, leaves, grass clippings, and other airborne pollutants. Over time, these contaminants accumulate on the coil’s fins, creating a thick layer of grime.
This buildup acts as an insulating barrier, severely impeding the coil’s ability to efficiently release heat. When the condenser can’t dissipate heat effectively, your AC system has to work significantly harder and for longer periods to achieve the desired cooling. This not only leads to a noticeable drop in cooling performance and increased energy bills but also places immense strain on the compressor and other vital components, accelerating wear and tear and potentially leading to premature system failure.
To clean your condenser coils, first, ensure the power to your outdoor unit is completely turned off at the circuit breaker for safety. Use a stiff brush or a specialized coil cleaning brush to gently remove loose debris from the fins. For a more thorough cleaning, you can carefully spray the coils with a garden hose on a gentle setting, directing the water from the inside out to push dirt away from the fins. Avoid using a high-pressure washer, as it can easily damage the delicate fins.
While a yearly hose rinse is beneficial, if your coils are excessively dirty or have stubborn, greasy grime, a professional HVAC technician might be needed. They can use specialized chemical coil cleaners that effectively break down tough buildup without harming the unit. Regular cleaning of your condenser coils is a simple yet highly effective maintenance task that prolongs the life of your AC and ensures efficient operation.
4. Diagnose a Frozen Evaporator Coil
Understand the impact of a frozen evaporator coil on your AC’s performance. It might seem counterintuitive, but one of the most common reasons your AC unit might be blowing warm or no air at all is a frozen evaporator coil. This internal coil, located inside your indoor unit, is responsible for absorbing heat from your home’s air using refrigerant. When airflow across this coil is restricted or the refrigerant level is too low, the coil’s surface can drop below freezing, causing ice to form.
A layer of ice on the evaporator coil effectively blocks the heat exchange process. The coil can no longer absorb heat from the air, and the fan attempting to blow air over it will simply be pushing warm air (or no air, if the ice completely obstructs airflow) into your living space. This problem often manifests as a noticeable decrease in cooling, higher indoor humidity, or even water leaking from your indoor unit as the ice eventually melts.
Several factors can lead to a frozen evaporator coil:
- Dirty Air Filters: As mentioned, a clogged filter is the primary culprit for reduced airflow.
- Blocked Ducts and Vents: Closed registers, furniture blocking vents, or damaged ductwork can also restrict air movement.
- Low Refrigerant Levels: Insufficient refrigerant pressure causes the coil temperature to drop excessively, leading to freezing.
- Faulty Blower Fan: A fan that isn’t moving air effectively will not allow the coil to properly absorb heat.
- Prolonged Operation in Cold Weather: Running the AC when outside temperatures are too low can also cause the coil to freeze.
To address a frozen coil, the first step is to turn off your AC unit at the thermostat and allow the ice to completely melt, which can take several hours. You can speed up the process by turning on only the fan (if your system has this option) to blow ambient air over the coil. While the ice is melting, inspect and address the underlying cause: change your air filter, ensure all vents are open and unobstructed, and check for any visible blockages in the return air vents. If the problem persists after thawing and addressing airflow issues, or if you suspect low refrigerant, it’s crucial to call a qualified HVAC technician. Dealing with refrigerant requires specialized tools and expertise to ensure safety and proper system function.
5. Investigate Low Refrigerant Levels
Air conditioner service and repair. If you’ve noticed that the air coming from your vents feels warm, sticky, or simply isn’t cooling your home effectively, a low refrigerant level could be the culprit. Refrigerant (often incorrectly referred to as Freon, a brand name) is the substance that circulates within your AC system, absorbing heat from your indoor air and releasing it outside. It is absolutely essential for the cooling process; without sufficient refrigerant, your system struggles to remove both heat and humidity from the air, leading to discomfort and inefficiency.
Unlike automotive oil, which is consumed over time, refrigerant in a closed AC system should never diminish. If your refrigerant levels are low, it’s a clear indication of a leak somewhere within the coils, lines, or connections of your HVAC system. Common signs of a refrigerant leak include a hissing or gurgling sound coming from the unit, ice buildup on the evaporator coil (as discussed earlier), and a noticeable drop in cooling performance.
Attempting to “refill” refrigerant yourself is strongly discouraged. Refrigerant is a hazardous chemical, and handling it requires specialized tools, training, and adherence to environmental regulations. Simply adding more refrigerant without fixing the underlying leak is a temporary and ineffective solution that can cause further damage to your system and harm the environment.
If you suspect a low refrigerant level or a leak, the best course of action is to contact a certified AC repair technician immediately. They can accurately diagnose the leak’s location, safely repair it, evacuate the system, and then properly recharge it with the correct type and amount of refrigerant. Addressing leaks promptly prevents further damage, restores efficiency, and protects the environment.
RELATED: 21 Easy Home Improvement Projects: Small Budget, Big Impact Upgrades
6. Inspect Uncleaned or Leaking Ducts
The impact of unclean or leaking ducts on your home’s air conditioning. Have you ever noticed that some rooms in your house are significantly warmer or cooler than others, despite your AC running? This uneven temperature distribution is a common sign of issues within your home’s ductwork. The ducts are essentially the circulatory system of your HVAC unit, responsible for distributing conditioned air throughout your entire home. When they are compromised, your AC’s efficiency and your comfort suffer greatly.
Ducts, though often hidden behind walls and ceilings, are not invincible. They can develop tears, holes, or loose connections due to various factors such as aging, pest infestations (rodents are notorious for chewing through duct material), or even damage during home renovations. A rip in these ducts allows precious cool air to escape into unconditioned spaces like attics, basements, or within wall cavities, rather than reaching your living areas. Conversely, unconditioned air can be drawn into the system through these leaks, contaminating your indoor air quality and making your AC work harder.
The consequences of leaky or dirty ducts are substantial. Firstly, they lead to significant energy loss, forcing your AC system to run longer and more frequently to maintain the set temperature, resulting in inflated energy bills. Secondly, they contribute to uneven cooling and hot spots throughout your home, diminishing comfort. Lastly, compromised ducts can pull in dust, allergens, and insulation particles, reducing your indoor air quality.
While some minor leaks in visible areas might be sealed with mastic sealant or metallic tape by a homeowner, major repairs or cleaning of extensive ductwork typically require professional intervention. An HVAC technician can perform a comprehensive duct inspection, including pressure testing, to pinpoint all leaks and areas of concern. They can then seal and insulate the ducts properly, or clean them thoroughly using specialized equipment to remove accumulated dust and debris. Addressing ductwork issues is a smart investment that can dramatically improve your AC’s performance, reduce energy costs, and enhance your home’s overall comfort and air quality.
7. Resolve Drainage Problems
Prevent drainage issues in your AC unit by inspecting and cleaning regularly. A fundamental function of your air conditioner, beyond cooling, is to remove excess humidity from the air. As warm, moist air passes over the cold evaporator coil, water vapor condenses into liquid, which then drips into a condensate pan and is channeled out of your home through a drain line. However, simple clogs in this drainage system are a surprisingly common source of various AC problems.
When the condensate drain line becomes obstructed, the collected water has nowhere to go. Common culprits for clogs include algae growth, mold, mildew, dust, dirt, and lint. As the drain line clogs, water backs up into the condensate pan. If left unaddressed, this pan will eventually overflow, leading to water damage to your AC unit itself, surrounding drywall, flooring, or other structural components of your home. Many modern AC units are equipped with a float switch that will automatically shut off the system if the condensate pan overflows, preventing water damage but also leaving you without cooling.
Beyond water damage and system shutdowns, a clogged drain line also creates a damp, stagnant environment ripe for microbial growth. This can lead to unpleasant, musty odors being blown throughout your house from the vents, diminishing your indoor air quality. Improperly mounted air conditioners, which don’t have the correct slope for drainage, are particularly prone to these issues.
Regular inspection and maintenance of your condensate drain line are essential. You can often prevent clogs by pouring a cup of distilled vinegar or a bleach/water solution (1 part bleach to 16 parts water) down the drain line access point every few months. For existing clogs, a wet/dry vacuum can often be used to suction out the blockage from the outdoor end of the drain line. Always ensure the AC power is off before attempting any maintenance. If you’re unsure or the clog is severe, calling a technician is advisable to avoid causing further damage or dealing with hazardous biological growth.
8. Address Connection Problems
It can be particularly frustrating when your air conditioner simply refuses to start, leaving you in the heat. Often, this isn’t a complex mechanical failure but rather an electrical connection problem that can sometimes be fixed with basic troubleshooting. Electrical issues are a common cause for an AC unit failing to power on or operate correctly.
One of the simplest checks is to see if a circuit breaker has tripped or a fuse has blown. Your AC unit, especially the outdoor condenser, draws a significant amount of power. An overloaded circuit or a sudden power surge can cause the breaker to trip as a safety measure. Locate your home’s electrical panel and check for any tripped breakers (usually indicated by a switch positioned between “on” and “off” or fully “off”). Reset it by flipping it completely off and then back on. If your system uses fuses, check for any blown ones and replace them as necessary. However, if the breaker trips repeatedly, it indicates a more serious electrical issue that requires professional attention.
Beyond basic power supply, several internal electrical components are critical for starting and continuously running your AC system. The compressor, condenser fan motor, and blower motor all rely on electrical connections to function. Capacitors, small cylindrical components, store electrical charge and provide the initial “kick” needed to start these motors. Over time, or due to power fluctuations, these capacitors can wear out or fail, preventing the motors from starting. Similarly, the contactor, an electrical relay switch, can wear out and fail to send power to the compressor and condenser fan.
If you hear a humming sound but no fan movement, or if the unit struggles to start, a faulty capacitor or contactor might be the cause. While these parts can be replaced by a DIYer with electrical experience, extreme caution must be exercised due to the high voltage involved. Always turn off the power at the breaker first. If these basic electrical checks don’t resolve the issue, or if you’re uncomfortable working with electricity, it’s always best to call a qualified AC repair technician. They have the expertise and safety equipment to diagnose and repair complex electrical faults without risk of injury or further damage to your system.
9. Avoid Improper Operation

Sometimes, the most significant “problems” with your air conditioning system aren’t mechanical failures at all, but rather simple habits of improper operation. Two of the most common and easily avoidable mistakes are leaving doors and windows open while the AC is running. This seemingly minor oversight can drastically diminish your air conditioner’s effectiveness, leading to discomfort, increased energy consumption, and unnecessary wear and tear on your unit.
When doors and windows are left open, your air conditioner is constantly trying to cool not just your interior space, but also the hot, humid air from outside that is continuously streaming in. This forces the system to work harder and longer to try and reach the thermostat’s set temperature, often unsuccessfully. The result is a home that never truly feels cool, excessively high energy bills, and a unit that experiences premature breakdown due to constant overwork.
Beyond open windows and doors, other improper operational habits include:
- Setting the Temperature Too Low: Cranking your thermostat down to extremely low temperatures won’t cool your home faster, but it will make your AC run continuously and inefficiently, wasting energy.
- Constantly Turning On and Off: Frequent cycling, especially with older units, can strain the compressor and other components. It’s often more efficient to set a comfortable temperature and let the system maintain it.
- Ignoring Ceiling Fans: Ceiling fans don’t cool the air, but they create a wind-chill effect that makes you feel cooler. Using them in conjunction with your AC allows you to set your thermostat a few degrees higher without sacrificing comfort, saving energy.
- Neglecting Smart Thermostat Features: If you have a programmable or smart thermostat, not utilizing features like scheduling or “away” modes means you’re not maximizing its energy-saving potential.
The quickest and most impactful tip to maintain your system’s efficiency and avoid many common AC issues is simply to ensure all exterior doors and windows are securely closed when your air conditioner is running. This allows your system to create and maintain a consistent, comfortable indoor environment without fighting against external conditions. By adopting smart operational habits, you can significantly extend the life of your AC, reduce energy consumption, and enjoy consistent cooling without needing frequent repairs.
Avoid having to go through all these AC repair tips in the first place by following these 15 air conditioner maintenance tips by Word of Advice TV:
These nine AC repair and troubleshooting tips offer practical solutions for common air conditioning problems that often plague homeowners. By taking the time to inspect, clean, and understand your unit’s basic functions, you can often restore your system’s performance and avoid the expense of a professional service call. However, it’s crucial to recognize your limits. If, after trying these tips, your air conditioner still isn’t functioning correctly, or if you encounter complex electrical or refrigerant issues, do not hesitate to contact a qualified HVAC technician. Attempting repairs beyond your skill level can lead to further damage, safety hazards, or even void your warranty. Prioritize your safety and the longevity of your system by knowing when to call in the experts for a proper diagnosis and repair.
Are there other AC repair tips that we might have missed, or a DIY fix that saved your day? Share your experiences and insights with us in the comments section below!
UP NEXT:
- 10 Home Appliance Maintenance Tips And Tricks You Must Know (INFOGRAPHIC)
- 19 DIY Projects For Home Improvement On A Budget
- How To Make A French Market Crochet Bag While Stuck At Home
Calling all crafting DIYhards, DIY Projects needs YOU! Click here if you want to contribute for us.
Don’t forget to stay connected with us on Facebook, Twitter, and Instagram!