
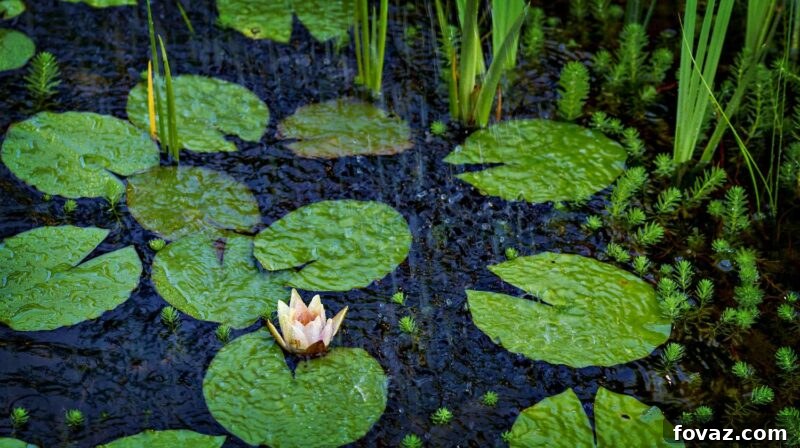
A serene backyard pond offers a tranquil escape, a mesmerizing dance of aquatic life, and the soothing sound of flowing water. However, maintaining that pristine beauty often requires more than just watchful eyes or even the help of your diligent janitor fish. To truly keep your pond healthy and crystal clear, a robust filtration system is indispensable. While numerous commercial options exist, building your own DIY pond filter can be a rewarding, cost-effective, and highly effective solution to ensure your aquatic ecosystem thrives.
RELATED: 10 Construction Paper Flowers | DIY Flower Craft Ideas
Building Your Own High-Performance Backyard Pond Filter
Understanding the Importance of Pond Filtration
There’s an undeniable allure to a well-maintained garden pond. It provides a unique habitat for aquatic plants and decorative fish, turning any backyard into a peaceful oasis. Yet, without proper care, this idyllic scene can quickly transform into an unsightly, algae-infested swamp. Algae blooms, murky water, and unpleasant odors are common issues stemming from an imbalance in the pond’s ecosystem, often caused by decaying organic matter and excess nutrients.
This is where pond filters and pumps become your best allies. They actively remove unwanted organic materials, debris, and harmful toxins, playing a crucial role in maintaining superior water quality. A good filtration system safeguards the health of your fish, prevents diseases, and enhances the overall aesthetic appeal of your pond. While commercial filters offer convenience, a homemade pond filter allows for customization to your pond’s specific needs, often at a fraction of the cost.
Key Benefits of a Robust Pond Filter
- Crystal Clear Water: Filters physically remove suspended particles, leaving your pond water sparkling and clear.
- Healthy Aquatic Life: By eliminating toxins like ammonia and nitrites, filters create a safe and stable environment for fish and plants.
- Algae Control: Mechanical filtration removes algae spores and nutrient-rich debris that fuels algae growth, helping to keep it in check.
- Reduced Odors: Proper filtration prevents the buildup of decaying organic matter, which is a primary source of unpleasant pond smells.
- Balanced Ecosystem: Biological filtration fosters beneficial bacteria that break down harmful waste products, contributing to a stable and self-sustaining ecosystem.
Materials You’ll Need for Your DIY Pond Filter
Before diving into the construction process, gather all your materials. Ensuring you have everything on hand will make the building process smoother and more efficient. We recommend a food-grade drum for safety, as it won’t leach harmful chemicals into your pond water.
- Filter Container: A 30-gallon plastic, food-grade drum is an excellent choice for its durability and capacity. Ensure it’s thoroughly cleaned before use.
- PVC Pipe (1 1/2 inch): Essential for constructing the internal water distribution system.
- PVC Pipe (2 inch): Used for the main drain and return lines, allowing for high flow rates.
- 1 1/2″ PVC Slip Tee: A T-shaped fitting used to create branches in the 1 1/2 inch pipe without threading.
- 1 1/2″ PVC Threaded Tee: Similar to a slip tee, but with threads on the perpendicular opening for attaching threaded components.
- Two 1 1/2″ PVC Elbows: Used to change the direction of the 1 1/2 inch pipe.
- 1 1/2 inch to 1 1/4 inch Threaded Nipple Reducer (or Threaded Hose Adapter): Connects the internal pipework to your pond hose.
- 3″ to 4″ Closet Flange: A plumbing part, typically for toilets, repurposed here to create a secure, wide opening for the pond return line.
- Four 1/4 inch x 1 1/2 inch Bolt, Nut, and Washer Combinations: For securely fastening the closet flange to the barrel.
- One Bottle Silicone Sealant (Aquarium Safe): Crucial for creating watertight seals and preventing leaks. Ensure it’s safe for aquatic environments.
- 2″ PVC Ball Valve: Installed on the drain line to easily control or shut off water flow for maintenance.
- 2″ Shower Drain: Used at the bottom of the barrel to act as the primary drain point.
- 3″-2″ ABS Bushing: A reducer fitting that allows a 2-inch pipe to be fitted into a 3-inch opening (like the closet flange).
- One Length of 1″ Hose: Connects the filter to your pond pump for water circulation.
- Two Hose Clamps: For securing the hose connections, preventing leaks.
- Filter Media or Plastic Fencing: The heart of your filter! This can be filter floss, bio-balls, lava rock, or plastic fencing to provide surface area for beneficial bacteria and trap debris.
- One Length of 1/2″ PVC Pipe: Used for constructing the internal support stand for the egg crate.
- Four 1/2″ PVC Elbows: For the internal support stand.
- 1/2″ PVC Cross (X-shaped): For the internal support stand, allowing for multiple pipe connections.
- Plastic Egg Crate Style Overhead 2×4 Light Grate (or similar): Found in hardware stores’ lighting sections, this provides a sturdy platform to support your filter media, keeping it off the bottom drain.
Let’s get started on building your DIY pond filter!
Pro Tip: Before you begin, thoroughly clean your barrel. Fill it with clean water, let it soak for a couple of days, and then rinse it multiple times. This ensures it’s safe and free of any contaminants that could harm your fish or plants.
Step-by-Step Homemade Pond Filter Construction
This DIY pond filter is designed to be highly effective, employing both mechanical and biological filtration principles. Follow these detailed instructions carefully to ensure a leak-proof and efficient system.
1. Constructing the Main Drain System
The drain is a critical component, allowing for easy cleanout of settled debris and maintenance. Accuracy in cutting and sealing here is paramount.
- Mark and Cut the Drain Hole: Carefully position the 2-inch shower drain at the very bottom center of the barrel, on the side (not the absolute bottom, but near the base of the side wall for practical access). Trace its outline precisely. Use a large drill bit to make several pilot holes around the inside of your traced circle. These holes will allow you to insert a jigsaw blade.
- Refine the Opening: Using your jigsaw, carefully connect the pilot holes, slowly cutting out the circular opening. Take your time, trimming the edges bit by bit until the shower drain fits snugly, ensuring a tight seal later.
- Install and Seal the Shower Drain: Insert the grate part of the shower drain from the inside of the barrel, so the drain mechanism is exposed on the exterior. Apply a generous bead of aquarium-safe silicone sealant along the inside edge of the drain where it meets the barrel. Ensure all surfaces to be sealed are wiped clean with rubbing alcohol beforehand to promote optimal adhesion. Don’t be shy with the sealant; you want it to “smoosh” out and create a complete, watertight barrier.
- Assemble the Drain Valve: Cut a short piece of 2-inch PVC pipe, just long enough to connect the shower drain to the ball valve. Apply PVC cement to both ends of this pipe and connect it to the 2-inch shower drain on the outside of the barrel. Immediately attach the 2-inch PVC ball valve to the other end of this pipe, ensuring all connections are firm and straight. Allow the PVC cement to cure fully according to the manufacturer’s instructions before the next steps.
Understanding PVC Pipe: PVC, or Polyvinyl Chloride, is a durable and cost-effective plastic piping material. It has largely replaced metal pipes in drainage and plumbing due due to its corrosion resistance, light weight, and ease of installation, making it ideal for this DIY project.
Ensure the entire drain assembly is firmly attached to the barrel and all seals are secure. This assembly will allow you to quickly drain the filter for cleaning.
RELATED: 21 Sneaky Hacks For A Secret Place To Hide Your Valuables
2. Creating the Pond Water Return Line
The return line is where filtered water re-enters your pond. A secure and leak-proof connection here is vital for continuous operation.
- Mark and Cut the Return Hole: Choose a suitable location on the barrel, typically a few inches from the top, for the pond return spout. Just like the drain hole, carefully trace the outline of the 3-4 inch closet flange. Drill pilot holes and use your jigsaw to cut the opening, trimming until the flange fits perfectly.
- Drill Bolt Holes: Hold the closet flange firmly in place over the cut opening on the barrel. Use a marker to mark the positions for the four bolts. Carefully drill the four 1/4-inch bolt holes. These bolts will provide essential compression to keep the flange securely pressed against the barrel, enhancing the seal.
- Seal and Secure the Flange: Thoroughly wipe down both the barrel surface around the hole and the back of the closet flange with rubbing alcohol. Apply a generous amount of silicone sealant to the back of the flange. Carefully position it over the hole and insert the four bolts from the outside. Add sealant into each bolt hole for extra protection.
- Fasten with Washers and Nuts: From the inside of the barrel, place a washer and then a nut onto each bolt. Tighten them firmly but avoid over-tightening, which could crack the barrel. As you tighten, the sealant should “smoosh” out, creating a comprehensive watertight seal around the flange and bolts.
- Insert the Bushing: The 3″-2″ ABS bushing is crucial here. Wipe down the inner surface of the flange’s opening and the bushing with rubbing alcohol. Apply silicone sealant to the outer edge of the bushing and press it firmly into the inner part of the flange. This bushing creates a secure, reduced opening for your 2-inch return pipe.
3. Assembling the Internal Filtration Structure
This internal pipework distributes incoming water across the filter media and then collects the filtered water, ensuring even and efficient filtration.
- Construct the Main Standpipe: Cut one piece of 1 1/2-inch PVC pipe to the height of the barrel, minus about 4-6 inches to account for the egg crate and filter media. This will be your central standpipe. Attach a 1 1/2-inch PVC slip tee to the bottom end of this pipe. The perpendicular opening of the tee should face outwards.
- Create the Distribution Arms: From the slip tee, cut two smaller pieces of 1 1/2-inch PVC pipe. These pieces should extend outwards towards the edges of the barrel, but not touch the sides. Attach a 1 1/2-inch PVC elbow to the end of each of these pipes. Angle these elbows to face opposite directions, preferably downwards or slightly to the sides. This configuration ensures even water distribution and prevents channeling through the filter media.
- Install the Egg Crate Support: The egg crate provides a platform for your filter media. First, assemble a sturdy stand using the 1/2-inch PVC pipe, elbows, and cross fitting. This stand should be designed to hold the egg crate several inches off the bottom of the barrel, above the internal pipework you just assembled. Once the stand is built, cut the plastic egg crate to fit snugly inside the barrel. Punch or cut a hole in the center of the egg crate large enough for the main 1 1/2-inch PVC standpipe to slide through.
- Insert Internal Assembly: Carefully lower the entire internal PVC assembly (standpipe, tee, and arms) into the barrel. Then, slide the egg crate with its support stand down the main standpipe and rest it securely above the distribution arms. This setup ensures that water flows evenly up through the filter media.
- Connect the Inlet (Hose Adapter): At the top of the main 1 1/2-inch PVC standpipe, attach the 1 1/2-inch threaded tee. The perpendicular opening of this tee will be used for your water inlet. Thread the 1 1/2-inch to 1 1/4-inch threaded nipple reducer (or threaded hose adapter) into this threaded tee. Secure the 1-inch hose from your pond pump to this adapter using a hose clamp.
- Air Intake (Optional but Recommended): The opening of the threaded tee that faces straight up should be left open. This acts as a passive air intake, allowing a small amount of air to be drawn into the filter. This can help with oxygenating the water and supporting aerobic biological filtration.
Check out this useful video by Scott Kyba to help you visualize your DIY Pond Filter construction:
Choosing and Placing Your Filter Media
The filter media is where the magic happens! It performs two crucial functions: mechanical filtration (trapping physical debris) and biological filtration (providing surface area for beneficial bacteria). Layering different media types can maximize efficiency.
- Bottom Layer (Coarse Mechanical): Directly on top of the egg crate, place a layer of coarse filter media. This could be large-pore sponges, lava rock, or even the plastic fencing mentioned in the materials list. This layer traps larger debris, preventing clogging of finer media.
- Middle Layer (Biological): Above the coarse layer, add your biological filter media. Bio-balls, ceramic rings, or smaller pieces of lava rock are excellent choices as they offer a high surface area for nitrifying bacteria to colonize. These bacteria convert harmful ammonia and nitrites into less toxic nitrates.
- Top Layer (Fine Mechanical): The final layer can be a finer filter floss or sponge. This traps smaller particles that bypassed the coarser media, ensuring the water is polished before returning to the pond.
Arrange your chosen filter media on top of the egg crate, ensuring it is packed snugly but not so tightly that it restricts water flow significantly. The water from the inlet will then be dispersed by the internal PVC arms, flow upwards through these layers of media, and exit via the pond return line.
Setting Up and Maintaining Your New Filter
Once your DIY filter is built, you’ll need to integrate it into your pond system. This typically involves connecting it to a pond pump (not included in this build, but essential for operation) that will draw water from your pond and push it into the filter.
- Connect the Pump: Attach your pond pump’s outlet hose to the 1-inch hose leading into the threaded adapter on your filter. Submerge the pump in your pond.
- Position the Filter: Place your filter in a suitable location near the pond. The pond return line should be positioned to direct the filtered water back into the pond, ideally creating some circulation.
- Initial Startup: Prime your pump if necessary, then turn it on. Monitor the filter closely for any leaks, especially around the drain and return line connections. Allow the filter to run continuously.
- Maintenance Routine: Over time, the filter media will accumulate debris. The ball valve on the drain makes flushing out sludge from the bottom of the barrel easy. For deeper cleaning, you may need to periodically remove and rinse the mechanical filter media (sponges, floss) in old pond water (not chlorinated tap water, which can kill beneficial bacteria). Biological media should be disturbed as little as possible to preserve the bacterial colonies.
A beautiful pond nearby adds immeasurable natural charm to your backyard. With your new DIY pond filter, you’re now equipped to keep that water clean, healthy, and free from impurities for years to come. Enjoy the serene beauty and vibrant life of your perfectly filtered aquatic sanctuary!
What do you think about this comprehensive DIY pond filter project? Share your thoughts and any tips you might have with us in the comments section below!
UP NEXT:
- DIY Backyard Project Ideas: Fence with Mason Jar Lighting
- 14 DIY Ideas For Your Backyard As Seen On Yard Crashers
- Backyard DIY Furniture Projects
Don’t forget to stay connected with us on Facebook, Twitter, Pinterest, and Instagram!
Editor’s Note: This post was originally published on March 7, 2016, and has been updated for quality and relevancy.